

Photo by Lee Campbell on Unsplash
Get your personal website up and running. Fast & free.
How to deploy a website, for beginners.


Website building made easy
Do you need a personal website but don't know where to start? Building a website can be a daunting task. With so many tools and services to choose from, finding the right ones can make the process more complicated than it needs to be. I'll be showing you how to set up a beautiful website with minimal effort so you can spend more of your time writing out the content for your website and less time worrying about the technical details - All without spending a dime.
The following post is heavily inspired by Leon Noel's How To Start Freelancing in 2022 video. Leon runs a free 30-week software engineering bootcamp for anyone looking to break into tech.
Okay, let's get started.
Choose a template
Good design is hard for beginners and time is a valuable asset. Using a template gives you a solid base of styles to work with that can later be customized using CSS if the need ever arises. Templates also save you a ton of time!
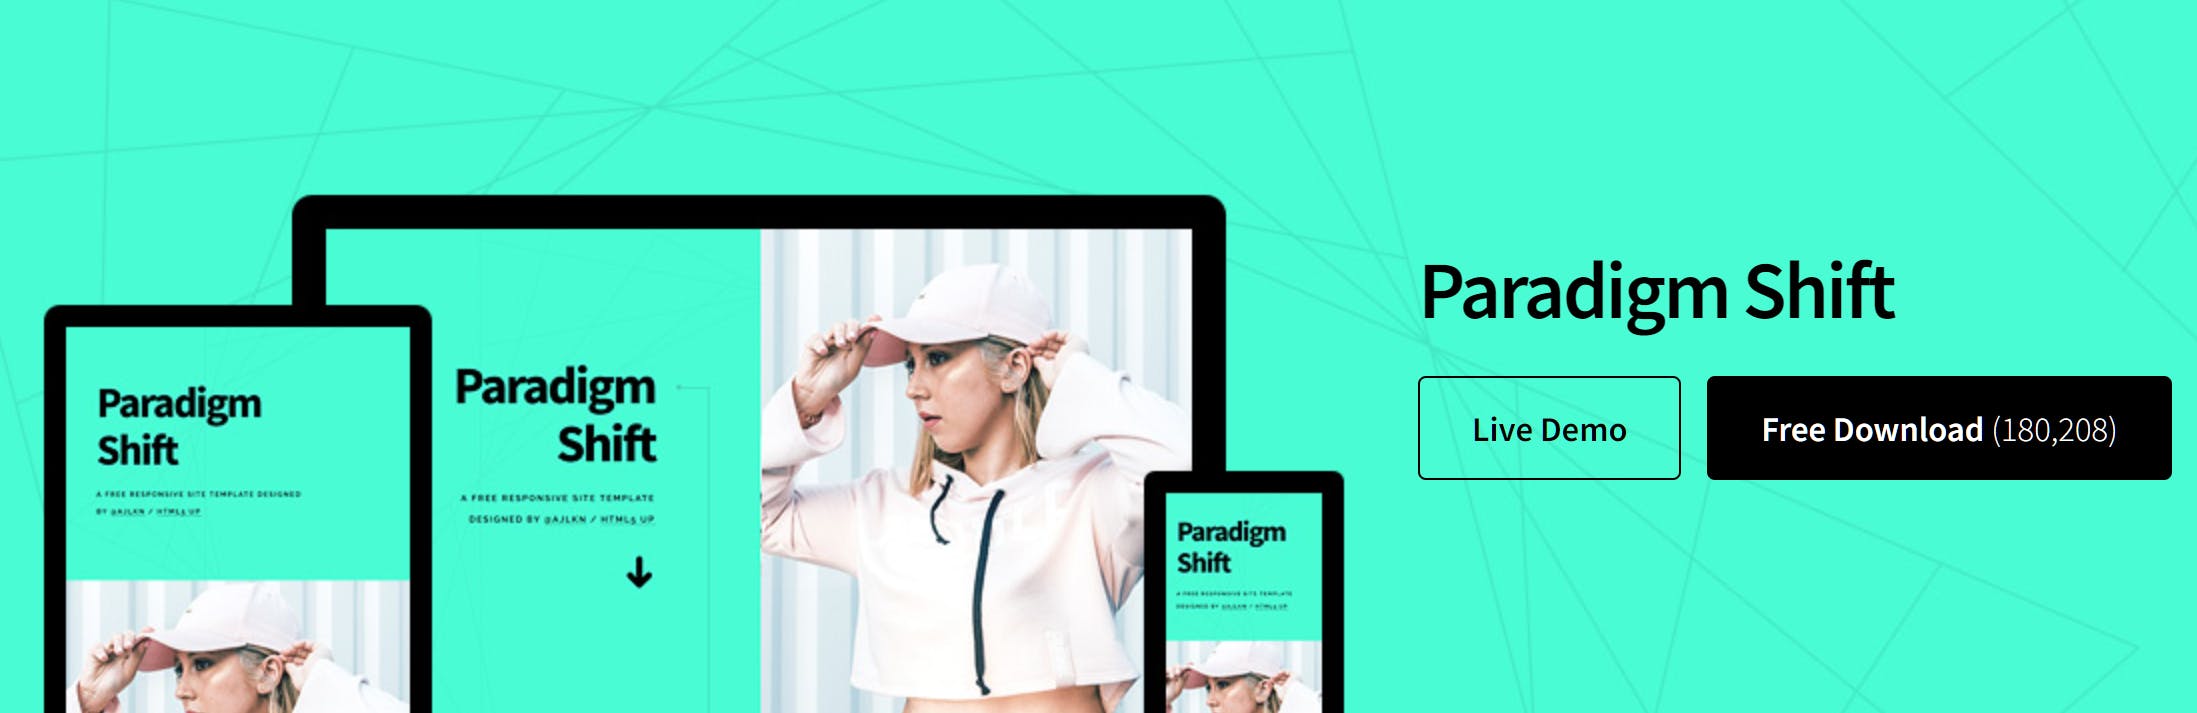
Check out these nifty templates from html5up. Browse around their website and download a template that you like.

For this tutorial, we'll be using the Paradigm Shift template, but you can still follow along using any template.
Working with your template
Now let's unzip the file, making sure the contents of the unzipped files are placed into a dedicated folder. After that, open up the unzipped folder in a text editor. I recommend using VS Code. Once opened, you should see all of the project files. Let's open up the index.html file at the root of our project folder.
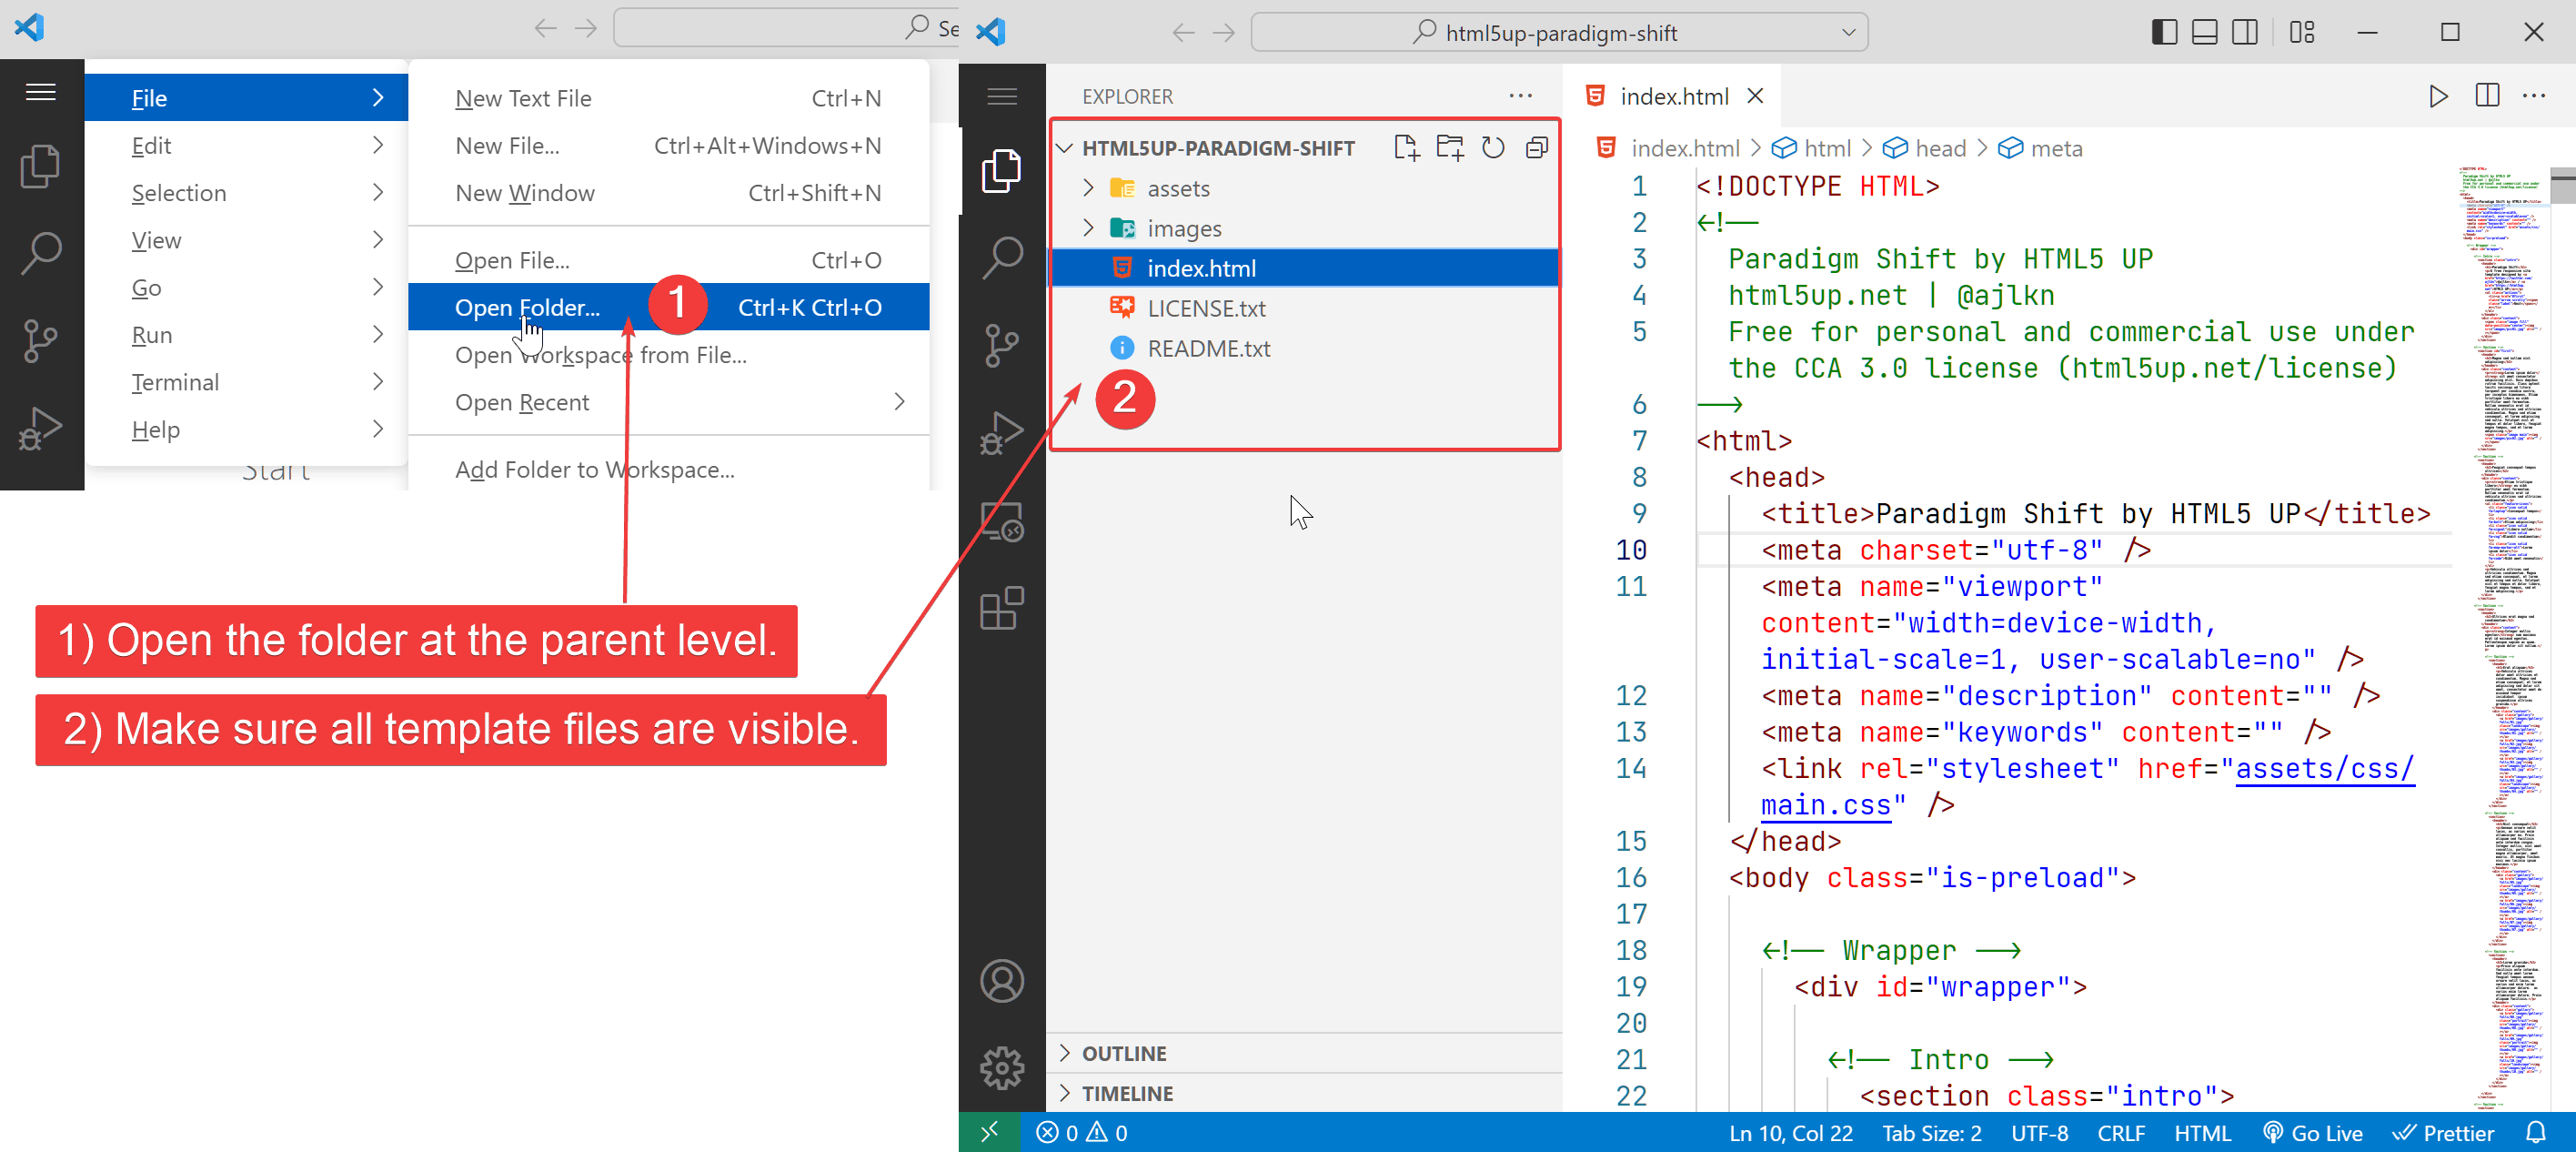
Browse around the code and get a feel for the structure. There are useful comments in the code that help with navigating through different sections of the site. We can replace the placeholder text with our own and use our own images. Unsplash is a great resource for free images.
You might also notice that there is a huge section in the code that is commented out (lines 159-424). The commented code serves as a reference, showing you what these html elements would look like on your website - by simply uncommenting the parts we are interested in viewing.
We can toggle comments in our code by highlighting the relevant parts and pressing Ctrl + / on Windows, or ⌘/ on a Mac. You can safely remove this extra code if it gets in the way and you know you won't be using it in the future.
Install the Live Server Extension
We've got the code, but we also want to view our project locally in a web browser. To do that, we will be using a VS Code extension called Live Server. Let's go ahead and install the extension.
1) Click the Extensions button in the sidebar
2) Search for 'live server' by Ritwick Dey
3) Click the install button
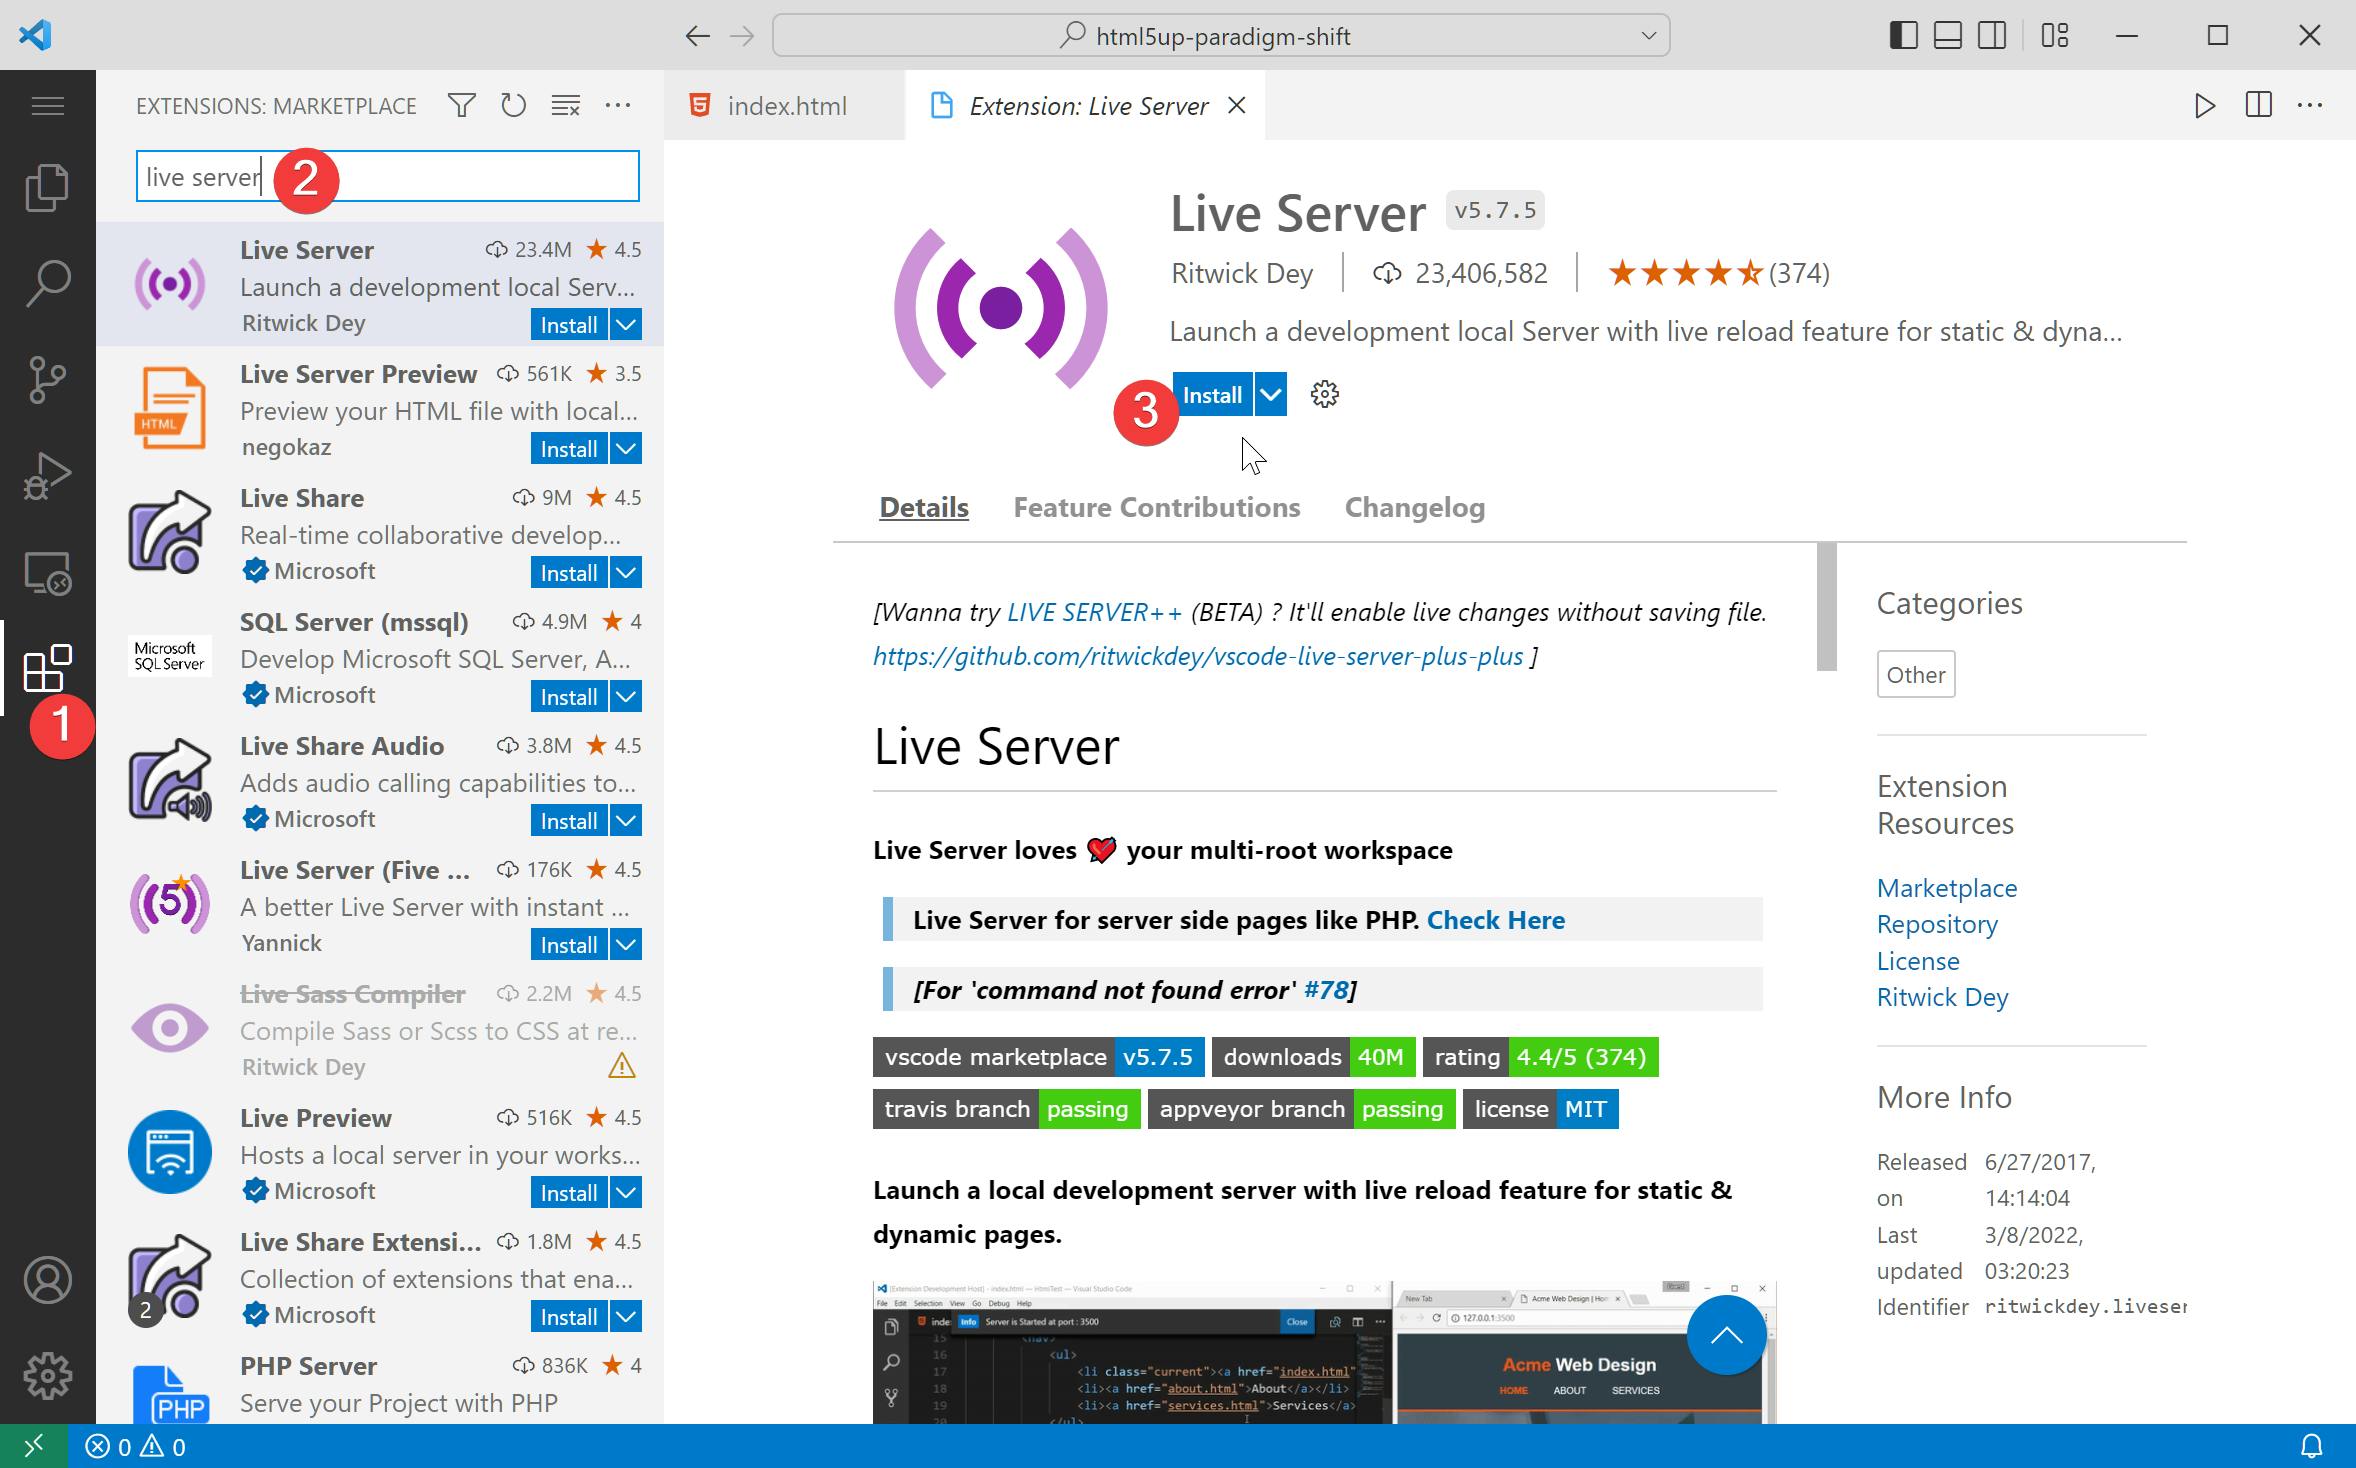
You should now see a Go Live button near the bottom right of your status bar in VS Code. Clicking the button will start a local server and automatically open your index.html file in your web browser. You can also manually navigate to localhost:5500 in your browser's address bar to view your website locally (just make sure the live server is running).
Now when we edit our html file and save it, we will see those changes reflected in the browser! Feel free to make a few edits before moving on.

Hosting your website
Let's publish our unfinished template file. Don't worry, we can always update it later. We will be using Netlify, an awesome, modern developer platform, to host our website free of charge. Head over to Netlify Drop.
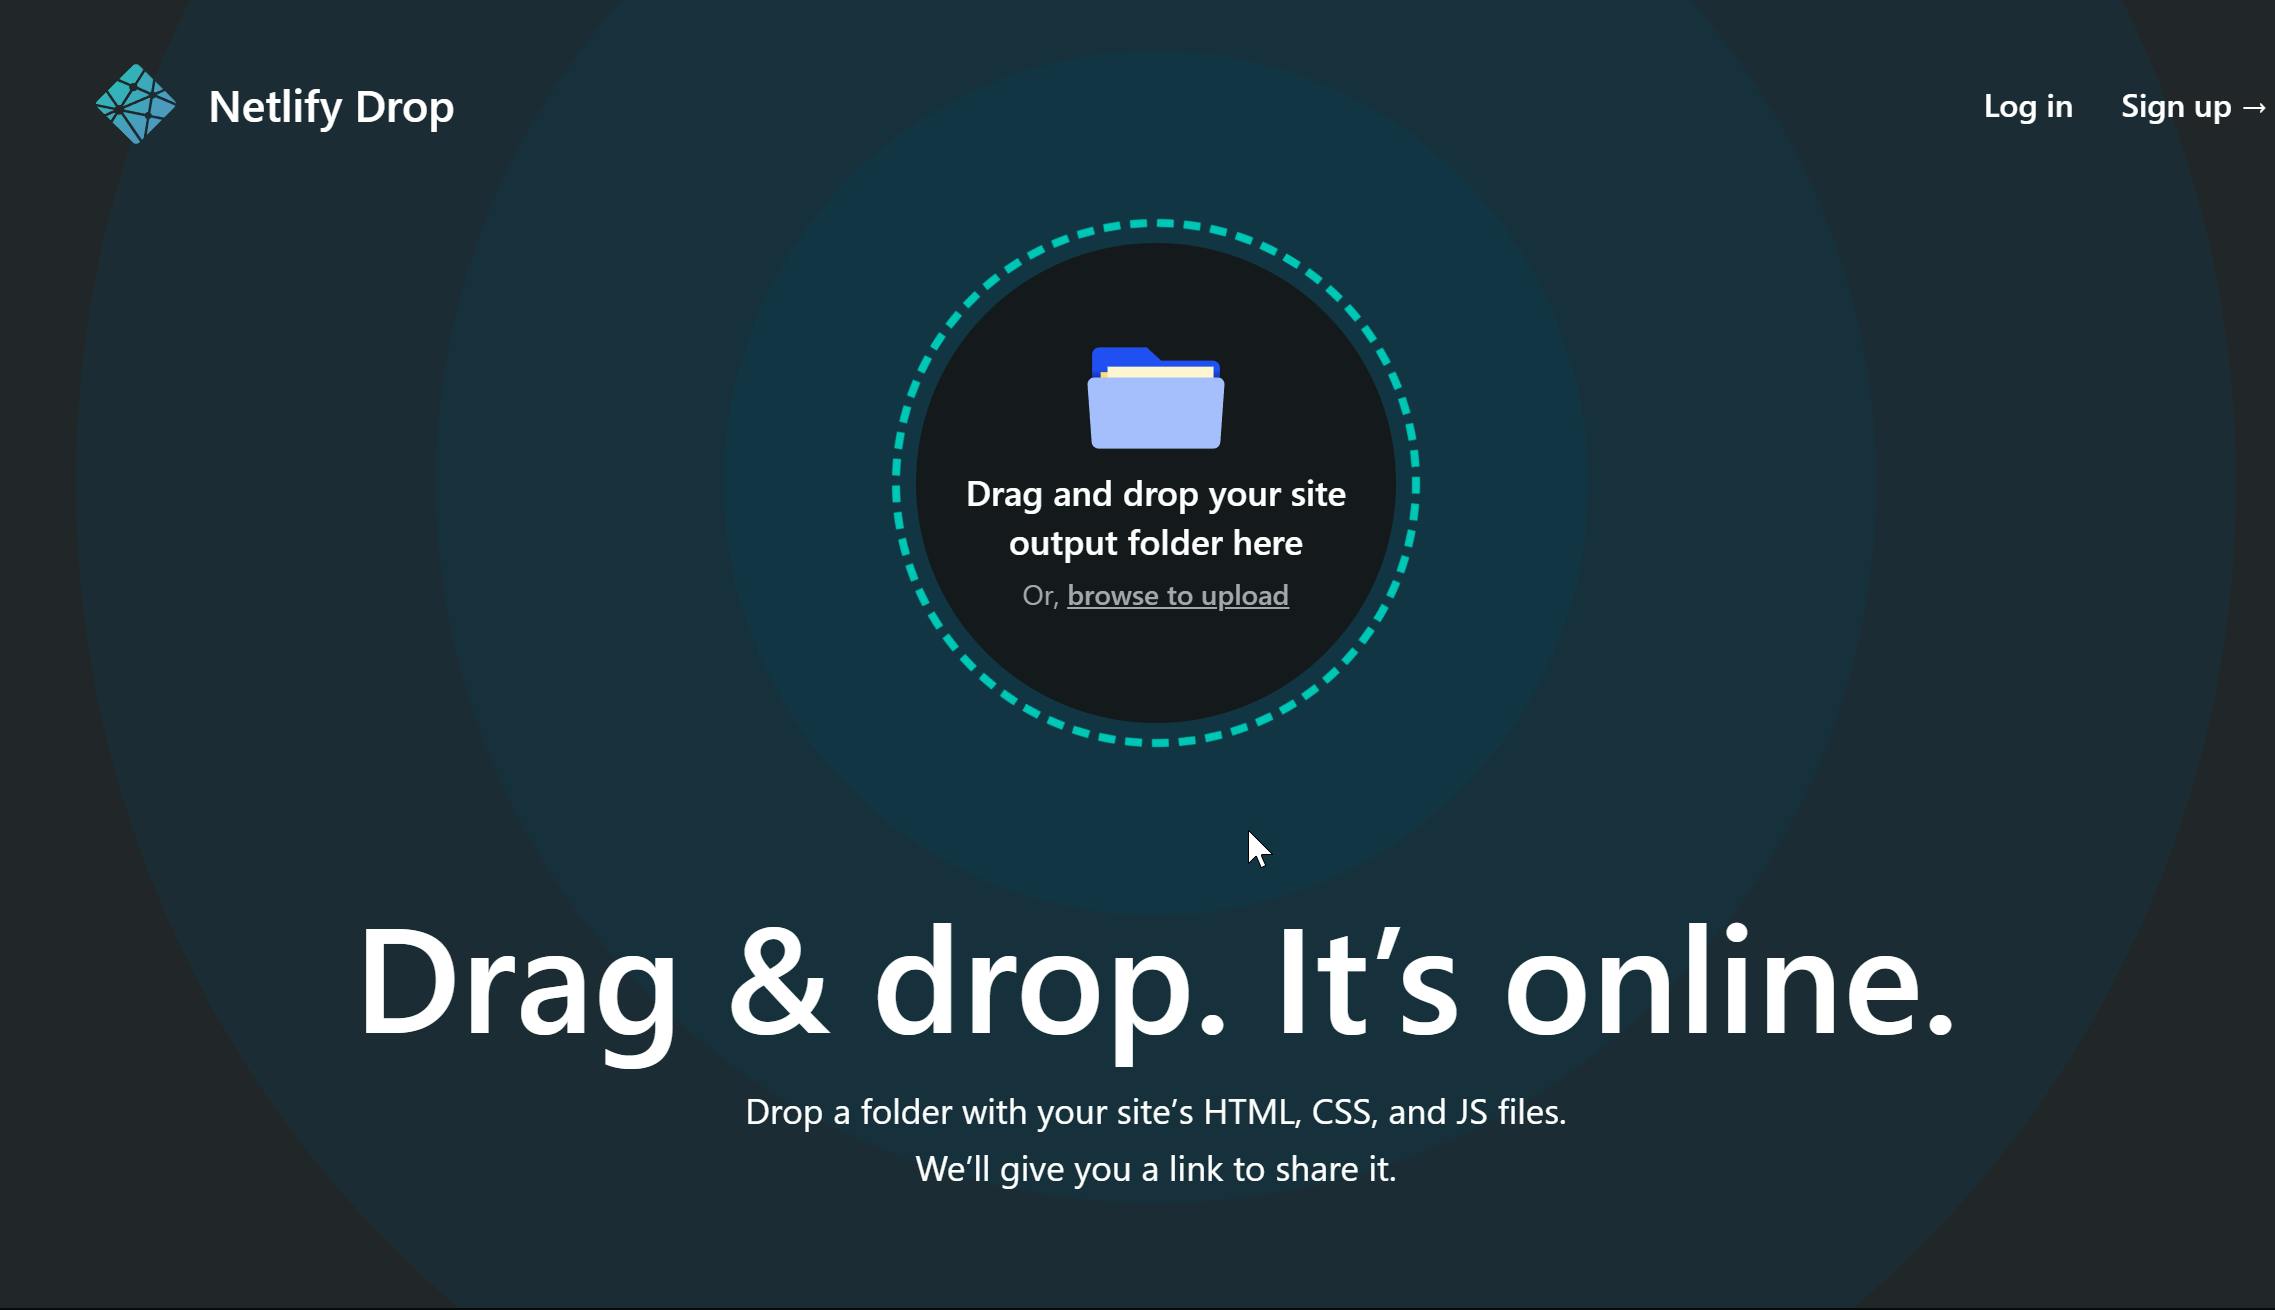
Drag and drop your template folder onto the Netlify website and you'll receive a live link pointing to your website. Click on the generated link. You now have a website hosted live on the internet!
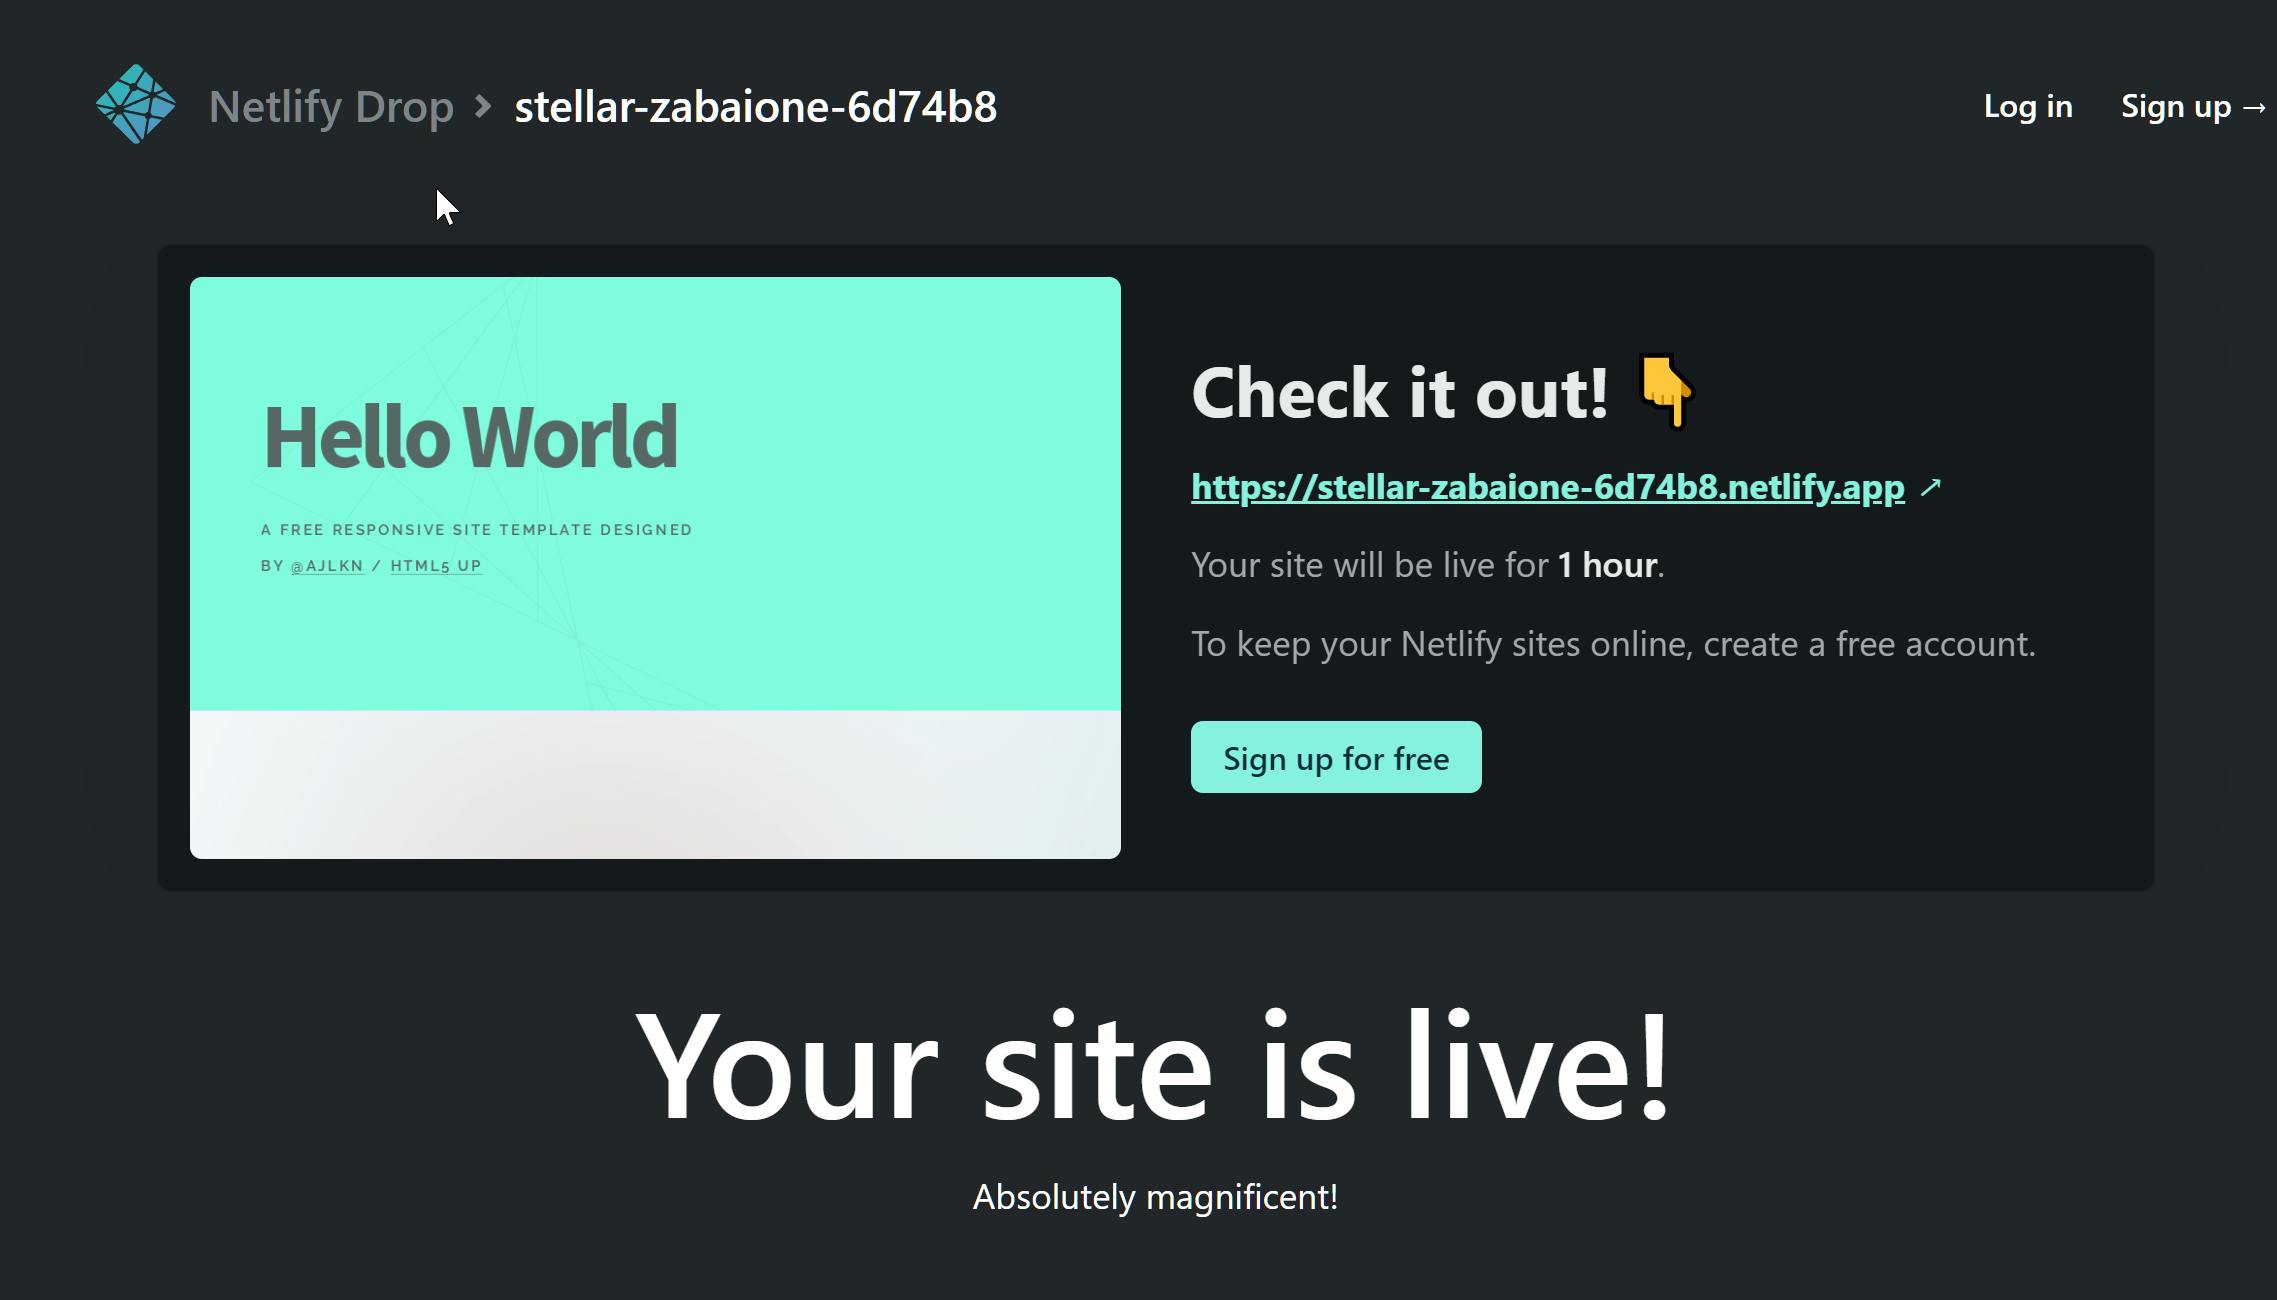
Wow! Simple, right?
To keep the website online, you'll need to create a free Netlify account, which will also allow us to change the website's generated URL to something shorter and more convenient.
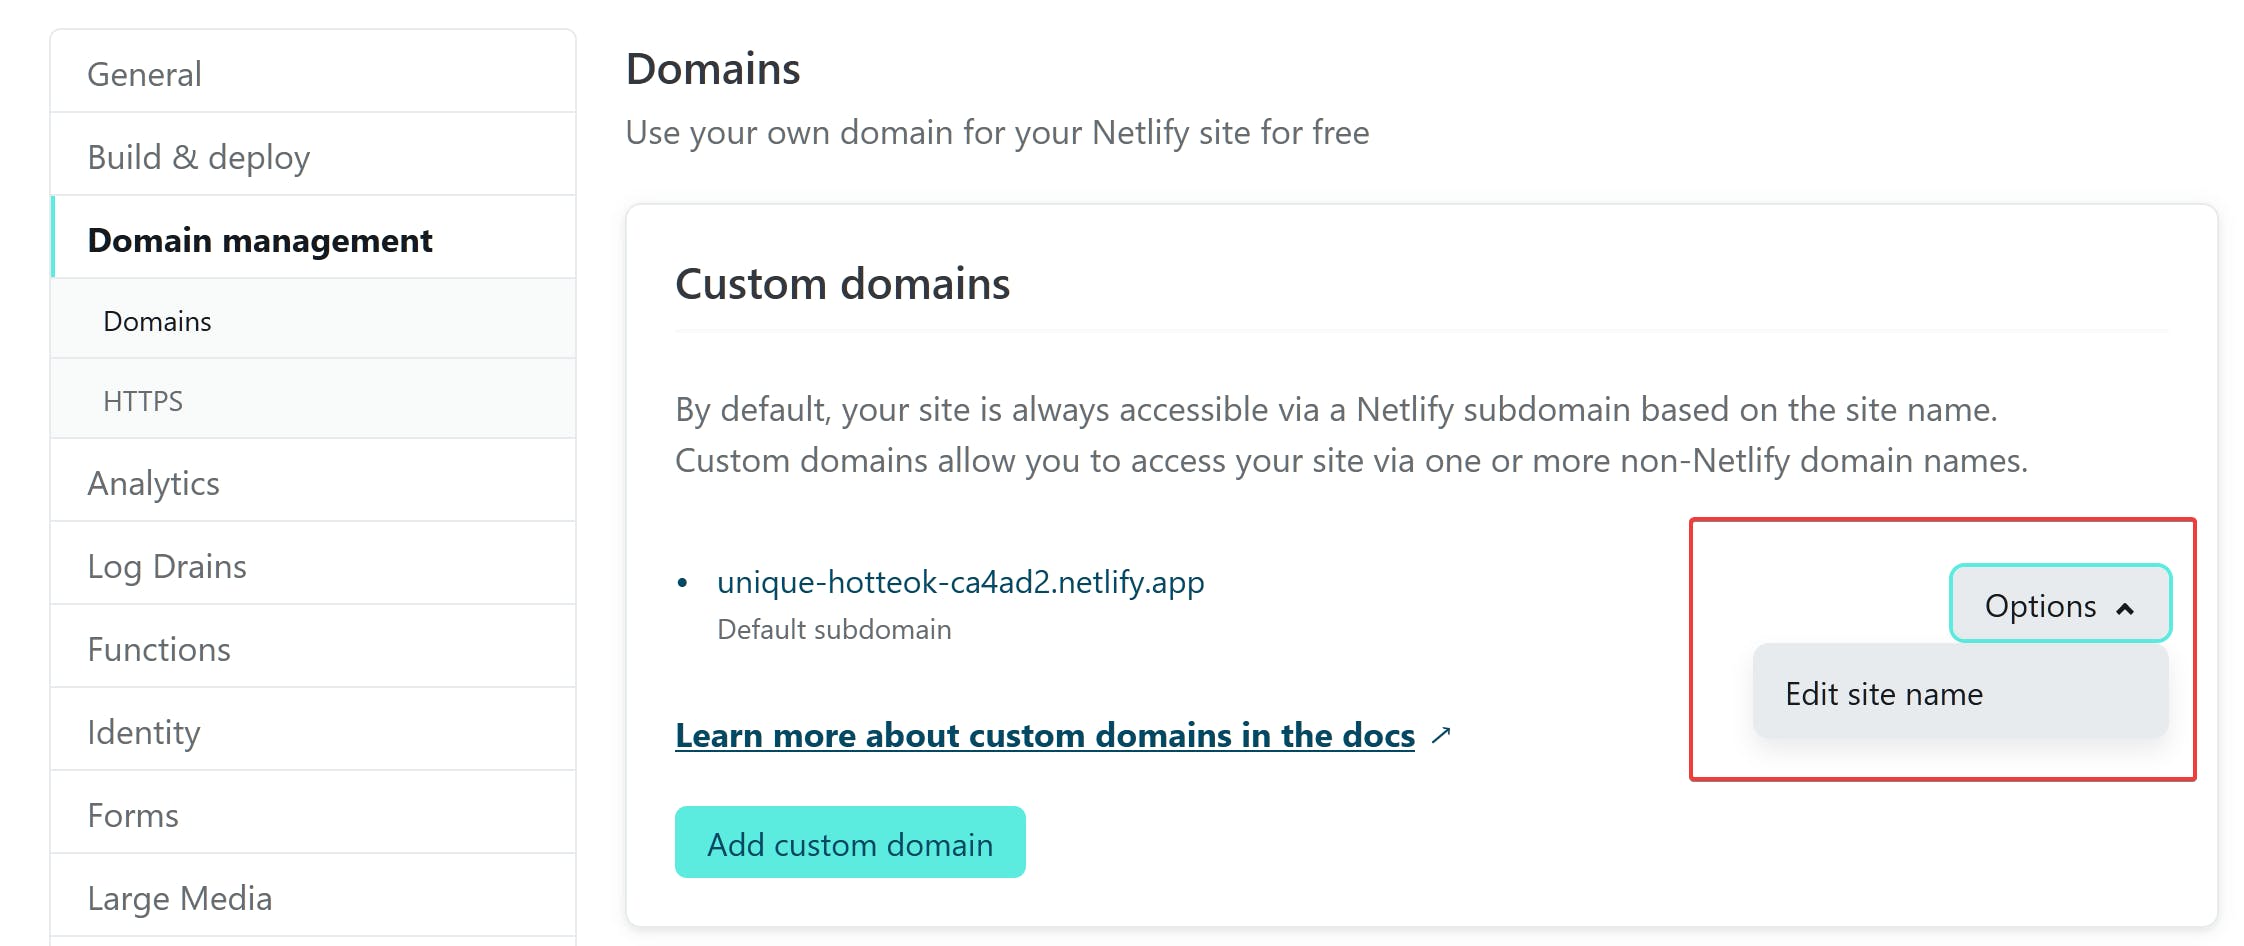
Change your website name
Once you've created an account, you'll be taken to your dashboard where you can see all of your deployed websites. Click on your newly created website to access the site's settings. From there, click on domain settings.
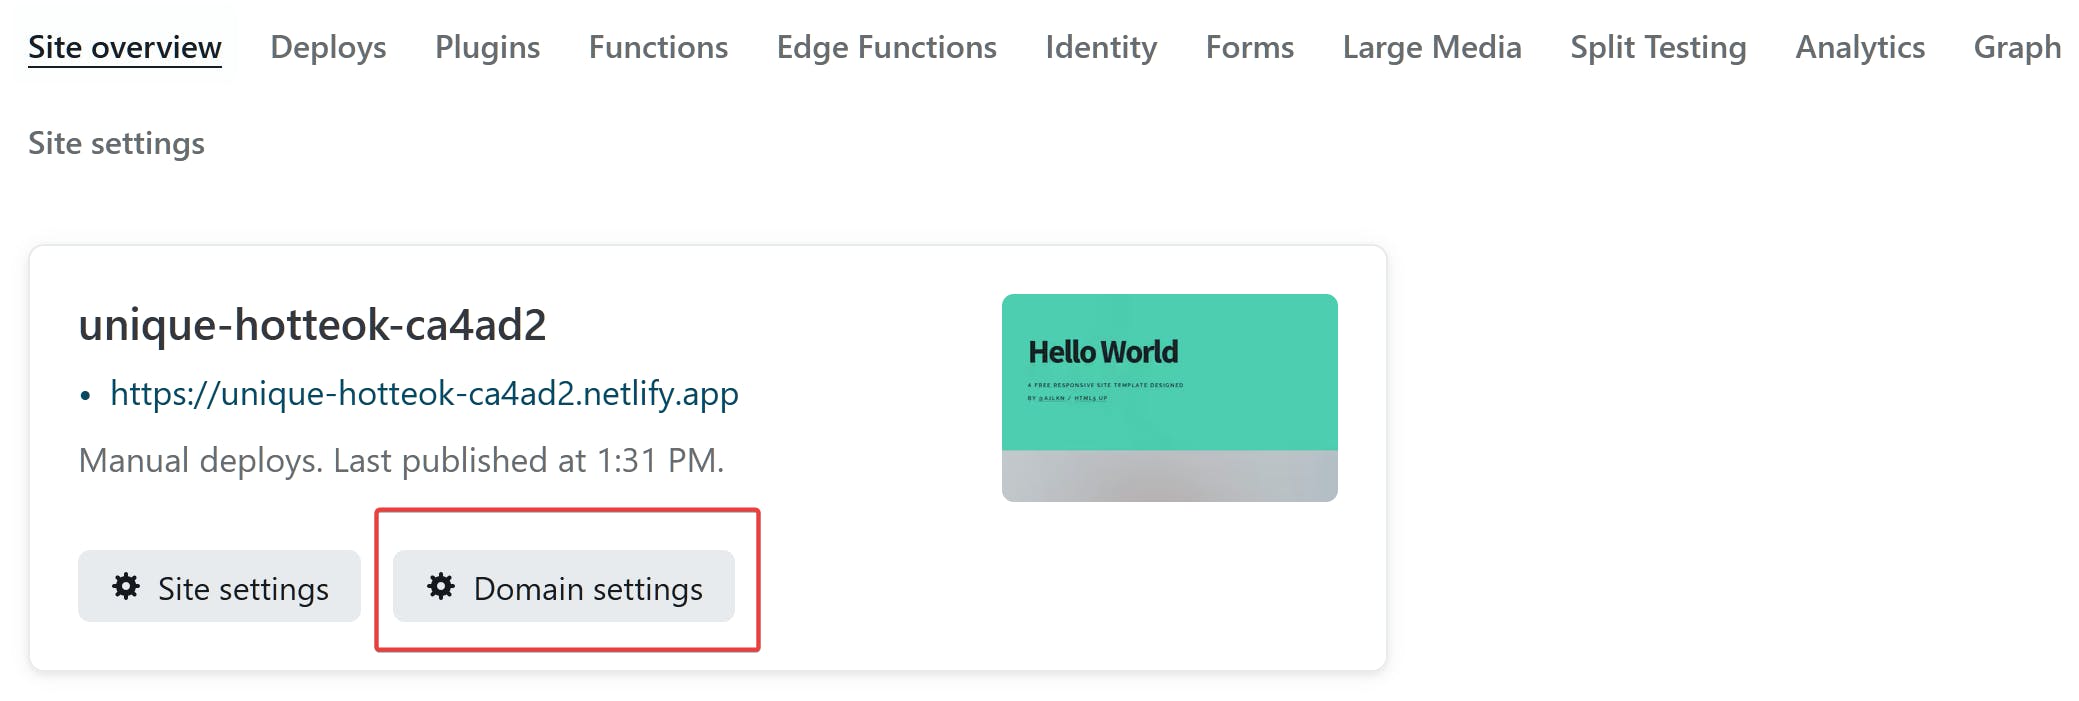
Finally, click on Options > Edit site name to change the name of your site.
Set up a contact form (Optional)
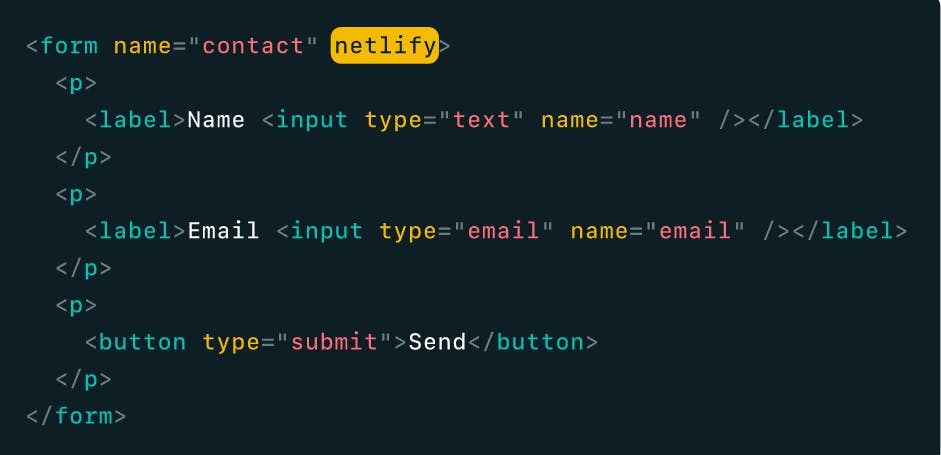
Most of the Html5Up templates provide contact forms, but they don't do anything when clicking submit. No worries, we can easily set up a form using Netlify.
Go into your index.html file and find the form html tag. Add the netlify attribute to the form tag and we're done. Easy!
But wait... we only made that change locally. We actually have to deploy that change onto Netlify to have the form work on our live site. Let's update our site in the next section.
Note: After updating your website, you can view all form submissions in the forms tab on Netlify. You can also set up email notifications for your forms by going into site settings > forms > add notification.
Update your Netlify site
When you're ready to update your live website after making some changes locally, head over to your website's settings page in Netlify, click on the deploy tab at the top, then drag and drop your folder into the highlighted area on the page.

Add a custom domain
Do you have a custom domain you would like to use instead of the default <name>.netlify.app subdomain?
Check out James Q Quick's Setup a Custom Domain with Netlify article for more info.
Wrapping it up
So there you have it. We've got ourselves a nice-looking template from html5up, got our development environment set up using VS Code, and successfully deployed our website to the web using Netlify without breaking a sweat. Now you can focus on writing the content for your webpage, which is the important part. I wish you luck.
Did you get stuck somewhere or need clarification on a topic? Ask me anything in the comments below. Also, feel free to share a link to your finished template website.